이 글에서는, 생성된 객체가 GC 에 의해, 소멸되는 시점에 대해 테스트해볼 것이다.
-
Global Execution Context 내부
-
테스트 1
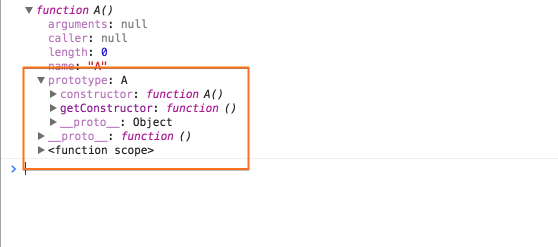
// global execution context function A(){} // A 생성자 함수 객체를 통해 새로운 객체를 생성한다. var obj = new A(); console.log(obj) // object Object -
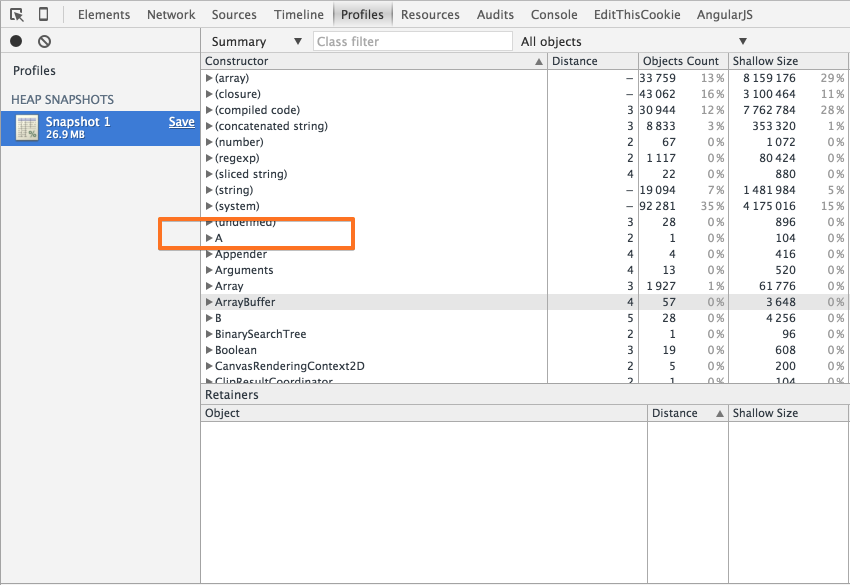
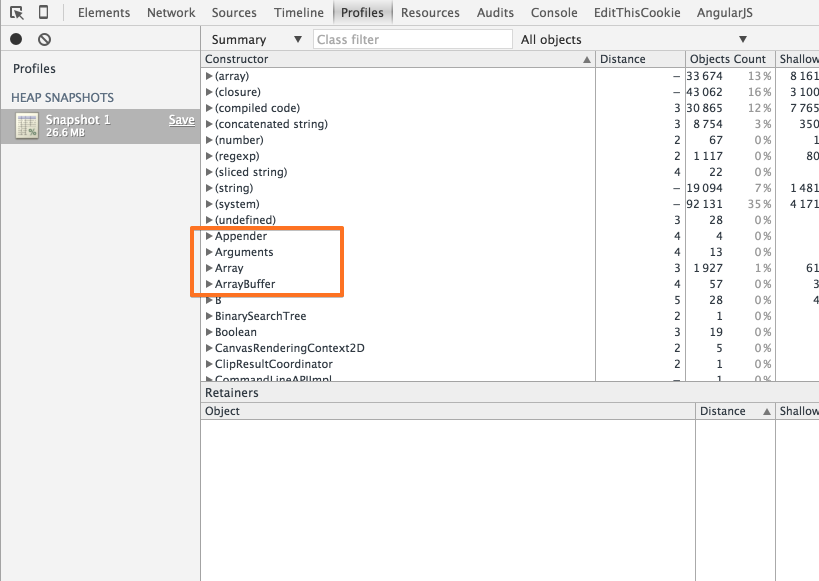
HEAP MEMORY CHECK
-
해당 객체가 Heap Memory 영역에 존재하는것을 볼 수 있다.
-
-
테스트 2
// global execution context function A(){} // A 생성자 함수 객체를 통해 새로운 객체를 생성한다. var obj = new A(); // obj 변수에 null 값을 할당하여, 생성된 객체를 GC 대상으로 만든다. obj = null; console.log(obj) // null -
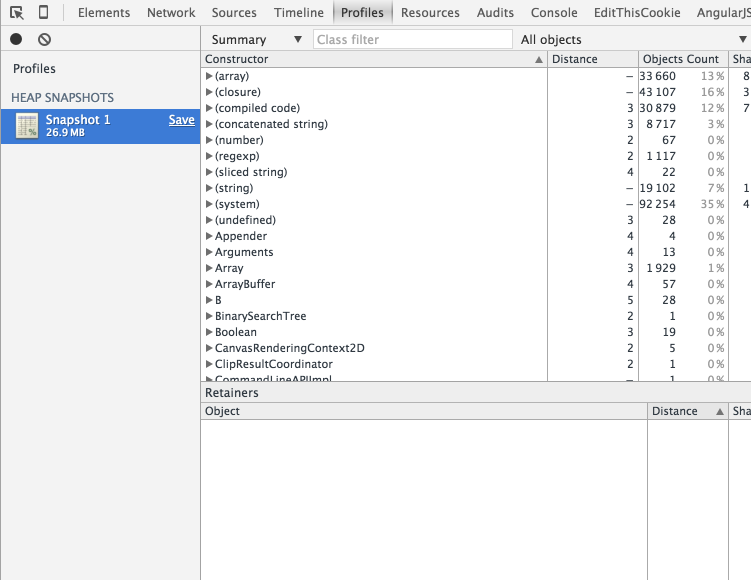
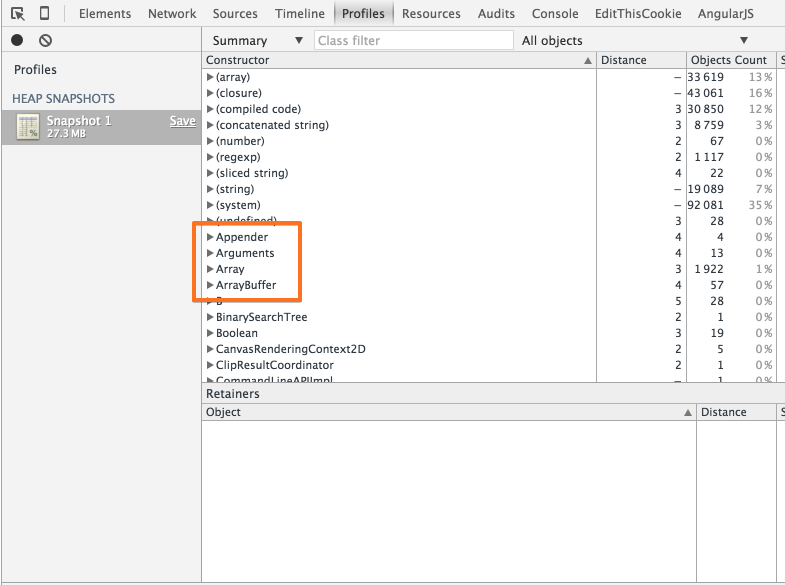
HEAP MEMORY CHECK
-
obj = null코드를 통해, 해당 객체를 GC 대상으로 만들었다. -
해당 객체가 Heap Memory 영역에서 소멸된 것을 볼 수 있다.
-
-
테스트 3
// global execution context function A(){} // A 생성자 함수 객체를 통해 새로운 객체를 생성한다. var obj = new A(); // x 변수에 obj 값(객체 참조 포인터)을 할당한다. var x = obj; // obj 변수에 null 값을 할당하여, 생성된 객체를 GC 대상으로 만든다. obj = null; // 해당 객체(new A())를 참조하는 대상(x 변수)이 아직 남아있기때문에, GC 에 의해 Heap Memory 영역에서 소멸되지않는다. console.log(x) // obj Object -
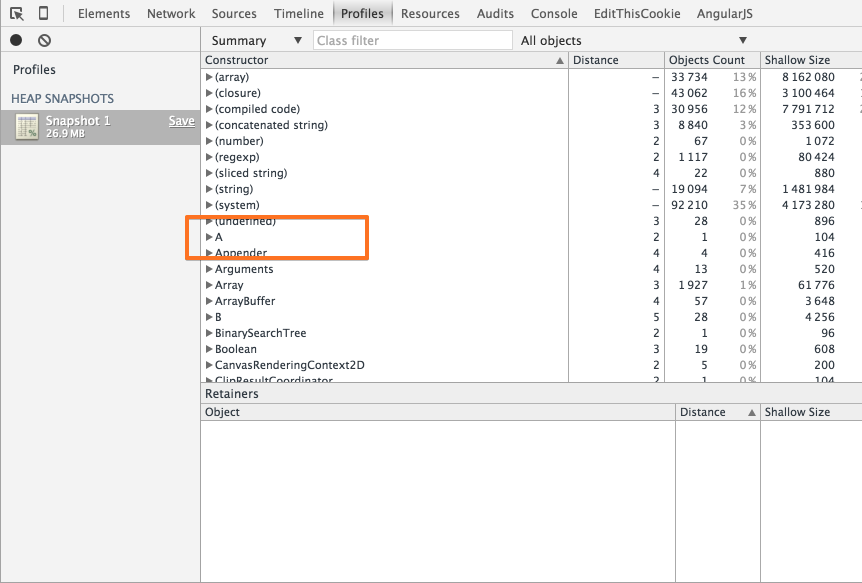
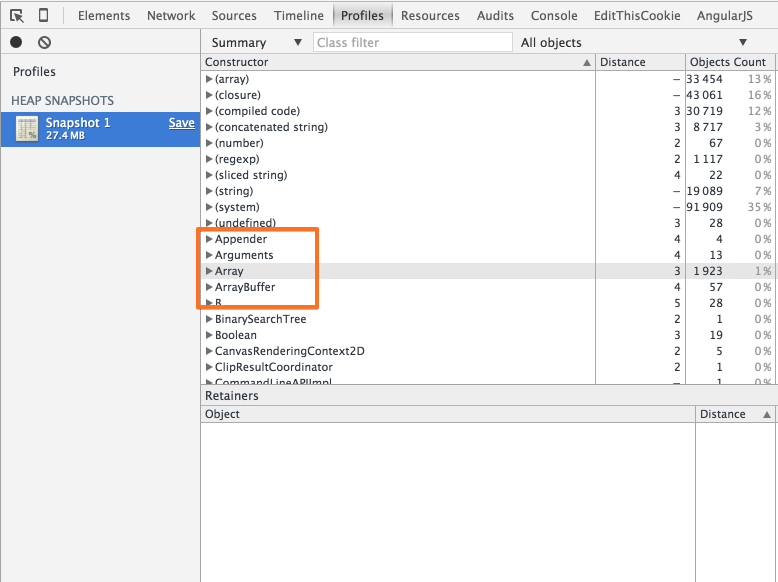
HEAP MEMORY CHECK
-
해당 객체를 참조하는 대상이 아직 남아있기때문에, GC 에 의해 Heap Memory 영역에서 소멸되지않는다.
-
-
테스트 4
// global execution context function A(){} // A 생성자 함수 객체를 통해 새로운 객체를 생성한다. var obj = new A(); // x 변수에 obj 값(객체 참조 포인터)을 할당한다. var x = obj; // obj 변수에 null 값을 할당하여, 생성된 객체를 GC 대상으로 만든다. obj = null; // x 변수에 null 값을 할당하여, 생성된 객체를 GC 대상으로 만든다. x = null; // x 변수에 새롭게 할당된 null 값이 반환된다. console.log(x) // null -
HEAP MEMORY CHECK
-
해당 객체를 참조하는 대상이 모두 사라졌기때문에, 객체가 Heap Memory 영역에서 소멸된 것을 볼 수 있다.
-
-
반드시 null 값만 할당해야 하는가?
```javascript // global execution context function A(){} // A 생성자 함수 객체를 통해 새로운 객체를 생성한다. var obj = new A(); // obj 변수에 다른 값을 할당하여, 생성된 객체를 GC 대상으로 만든다. obj = 1; console.log(obj) // 1 ```-
HEAP MEMORY CHECK
-
null 값이 아닌, 다른 값을 할당해도, 객체는 Heap Memory 영역에서 소멸된다.

-
-
-
-
Function Execution Context 내부
-
x 변수에는 obj 변수에 할당된 객체 참조 포인터(값)가 할당된다.
```javascript // global execution context // obj 변수에 객체를 할당한다. var obj = {x: 1}; function B(){ // function execution context // x 변수를 obj 변수 값으로 초기화한다. // obj 변수 값: 객체 참조 포인터 var x = obj; // x 변수를 통해, 객체를 확장한다. x.y = 2; console.log(obj); // {x: 1, y: 2} } B(); ``` -
테스트 1
```javascript // global execution context function A(){}; // A 생성자 함수 객체를 통해 새로운 객체를 생성한다. var obj = new A(); function B(){ // function execution context // obj 변수에 null 값을 할당하여, 생성된 객체를 GC 대상으로 만든다. obj = null; console.log(obj); } B(); ```-
HEAP MEMORY CHECK
-
예상했던대로, 객체는 Heap Memory 영역에서 소멸된다.
-
-
-
테스트 2
```javascript // global execution context function A(){}; // A 생성자 함수 객체를 통해 새로운 객체를 생성한다. var obj = new A(); function B(){ // function execution context var x = obj; // obj 변수에 null 값을 할당하여, 생성된 객체를 GC 대상으로 만든다. obj = null; console.log(obj); // null // 해당 객체(new A())를 참조하는 대상(x 변수)이 아직 남아있기때문에, GC 에 의해 Heap Memory 영역에서 소멸되지않았다. console.log(x); // object Object } B(); ```-
HEAP MEMORY CHECK
-
함수 종료 후(== AO 가 소멸되는 시점)에는 해당 객체를 참조하는 대상이 모두 사라졌기때문에, 객체가 Heap Memory 영역에서 소멸된 것을 볼 수 있다.
-
-
-
테스트 3
```javascript // global execution context function A(){}; // A 생성자 함수 객체를 통해 새로운 객체를 생성한다. var obj = new A(); function B(){ // function execution context // x 는 globalExecutionContext 내부 VO 의 새로운 속성으로 추가된다. x = obj; // === this.x = obj; // obj 변수에 null 값을 할당하여, 생성된 객체를 GC 대상으로 만든다. obj = null; console.log(obj); // null // 해당 객체(new A())를 참조하는 대상(x 변수)이 아직 남아있기때문에, GC 에 의해 Heap Memory 영역에서 소멸되지않았다. console.log(x); // object Object } B(); ```-
HEAP MEMORY CHECK
-
이 같은 경우, 함수 종료 후(== AO 가 소멸되는 시점)에도 해당 객체를 참조하는 대상(globalExecutionContext.VO.x)이 아직 남아있기때문에, 객체가 Heap Memory 영역에서 소멸되지 않는다.

-
-
-
테스트 결과
-
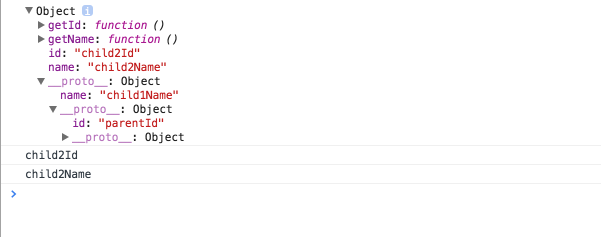
var x = obj코드를 통해, x 변수에는 obj 변수에 할당된 객체 포인터(값)가 할당된다.<p> -
생성된 객체는 그 객체를 참조하는 대상이 없을경우에만 GC 에 의해, Heap Memory 영역에서 소멸된다.<p>
- 즉 null(or 다른 값) 값만 할당한다고 무조건 소멸되는 것은 아니다.
-
null 값이 아닌, 다른 값을 할당해도, 객체는 Heap Memory 영역에서 소멸된다.
-
JS 는 개발자가 직접 Heap Memory 영역에 할당된 객체를 소멸시킬 수 있는 방법을 제공하지 않는다.
- 즉
null값을 할당하거나,delete연산자를 통해 VO 의 속성을 삭제하는것은, 모두 간접적으로 GC를 통해, 객체를 소멸시키는 방법들이다.<p>
- 즉
-
AO 의 속성으로 할당된 객체 참조는 함수 종료 시 모두 GC 에 의해 소멸된다.<p>